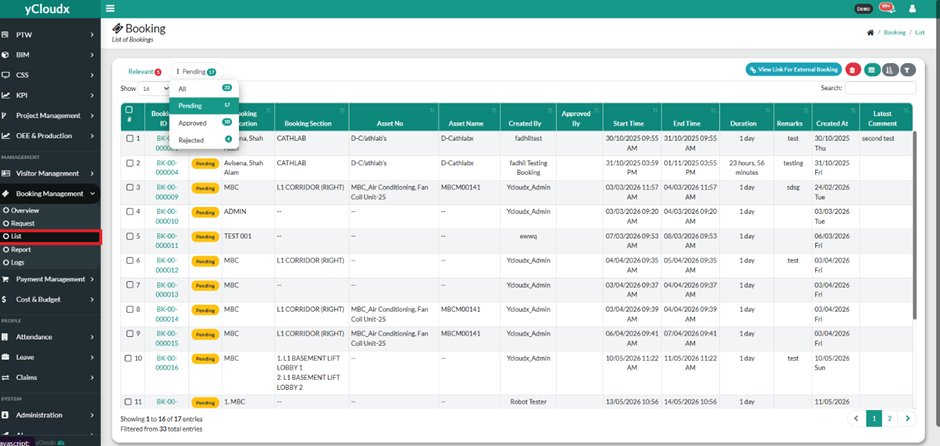
Go to Booking Management > List to view all booking requests, then use the Status filter and select Pending to display bookings that are waiting for approval.
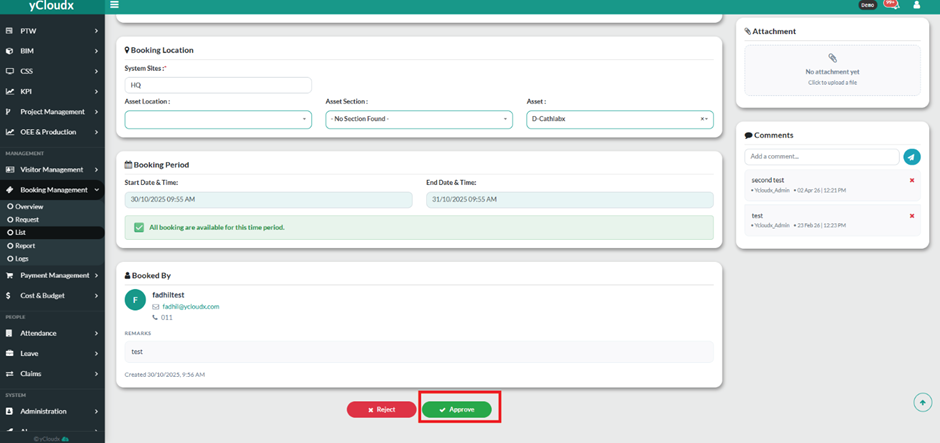
Select the Booking ID of the pending request to open the booking details and review the Booking ID, booking status, location, section, asset, requester, start and end time, duration, remarks, attachments, and comments.
Verify the Booking Location to ensure the selected System Site, Location, Section, and Asset are correct.
Check the Booking Period to confirm the requested Start Date & Time and End Date & Time, and ensure the booking is available for the requested period.
Review the Booked By information to confirm the requester and check any available contact information.
Review any Remarks, Attachments, or Comments provided with the booking request before making a decision.
If the booking is acceptable, click the Approve button at the bottom of the booking details page.
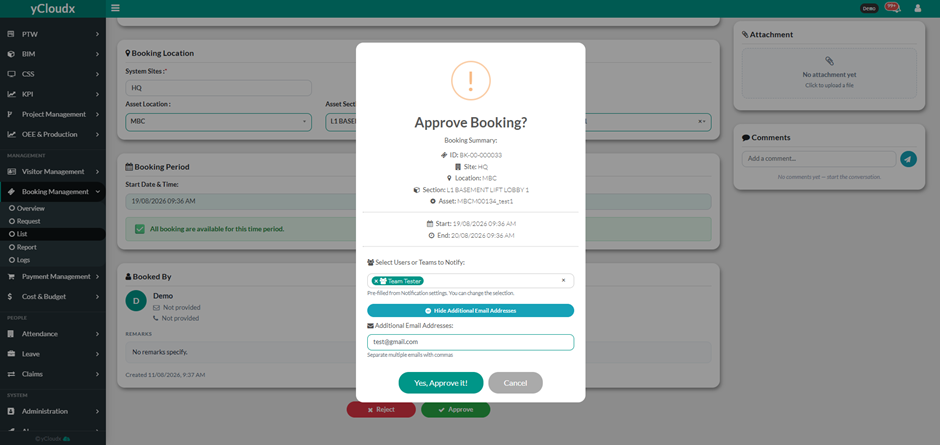
In the Approve Booking? confirmation window, review the booking summary, including the Booking ID, Site, Location, Start Date & Time, and End Date & Time.
Under Select Users or Teams to Notify, select the relevant users or teams who should receive the booking approval notification.
If required, enter additional email addresses under Additional Email Addresses, separating multiple email addresses with commas.
Click Yes, Approve it! to confirm the approval. The booking status will then be updated from Pending to Approved and the selected users or teams will be notified.
If the booking is not acceptable, click Reject instead and proceed with the booking rejection process and the status will change to Rejected .
Note: If the approver reject the booking, the item will be available back for the booking on that specific date and time to be book again