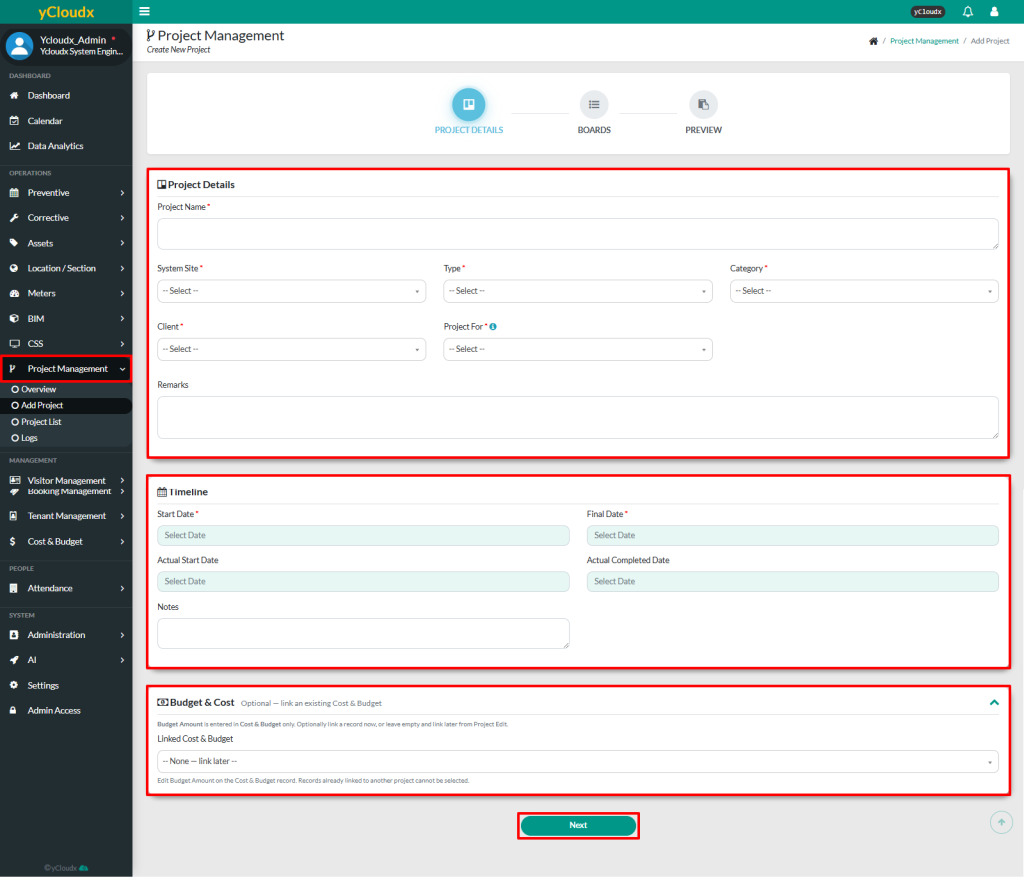
User need to enter the required information under the Project Details section, including Project Name, System Site, Type, Category, Client and Project For
User also need to enter the projectTimeline details including the Start Date and Final Date.Others are optional but it is best to fill in all including the Actual Start Date, Actual Completed Date and Notes if required
Expand the Budget & Cost section to link an existing cost & budget record if required
Click Next to proceed to the next page
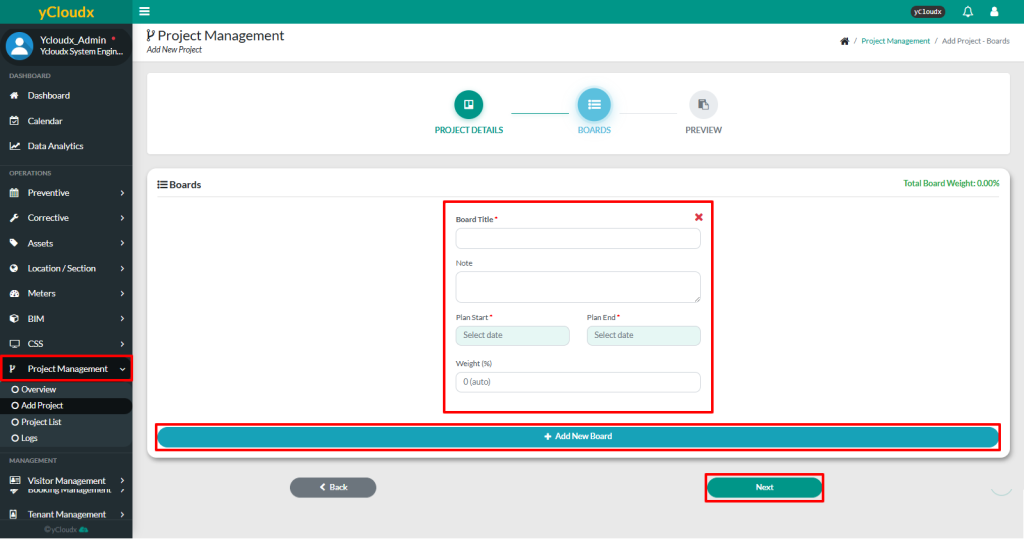
On the second page, user need to enter the required Board Title, Plan Start and Plan End. User also able to enter the note and weight for each board if needed
User able to create additional board by click the Add New Board button
Once all the board details have been completed, click Next
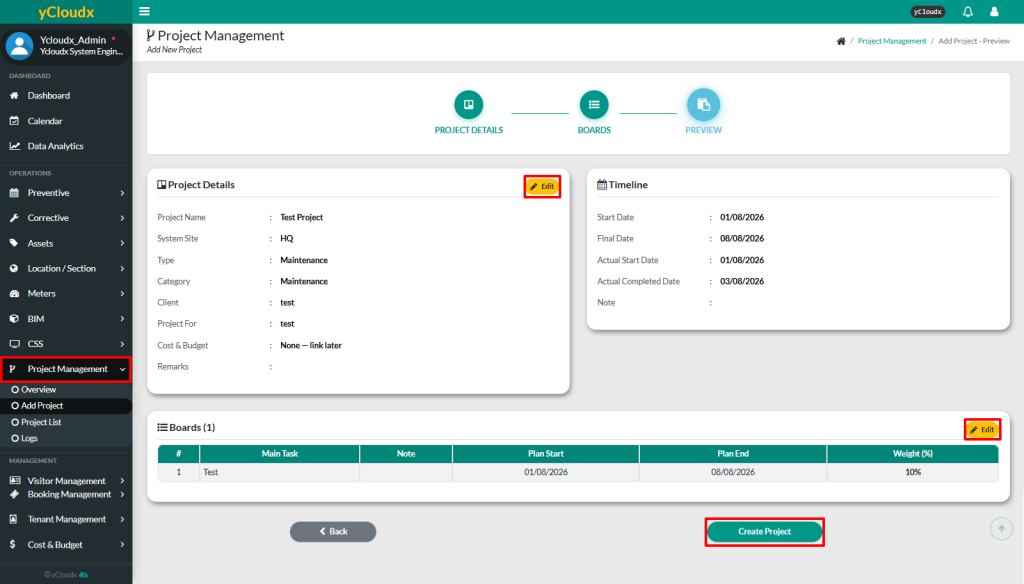
Review the project details under the Preview page
User able to click Edit button to modify the project details if needed
Once all the details have been review, click Create Project button
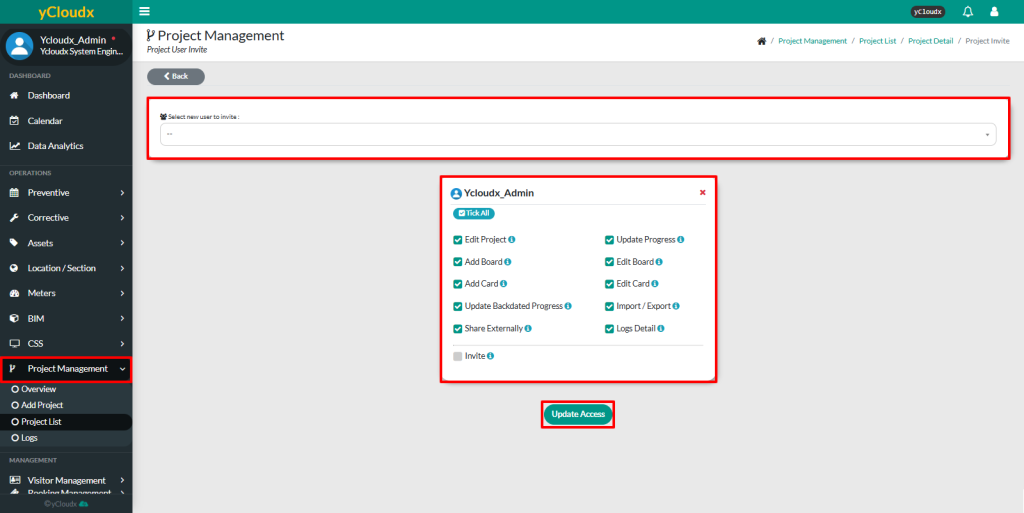
On this page, user able to select the users to invite to the project from the user list
Tick the required access permissions for each selected user
Click Update Access to save the user access settings
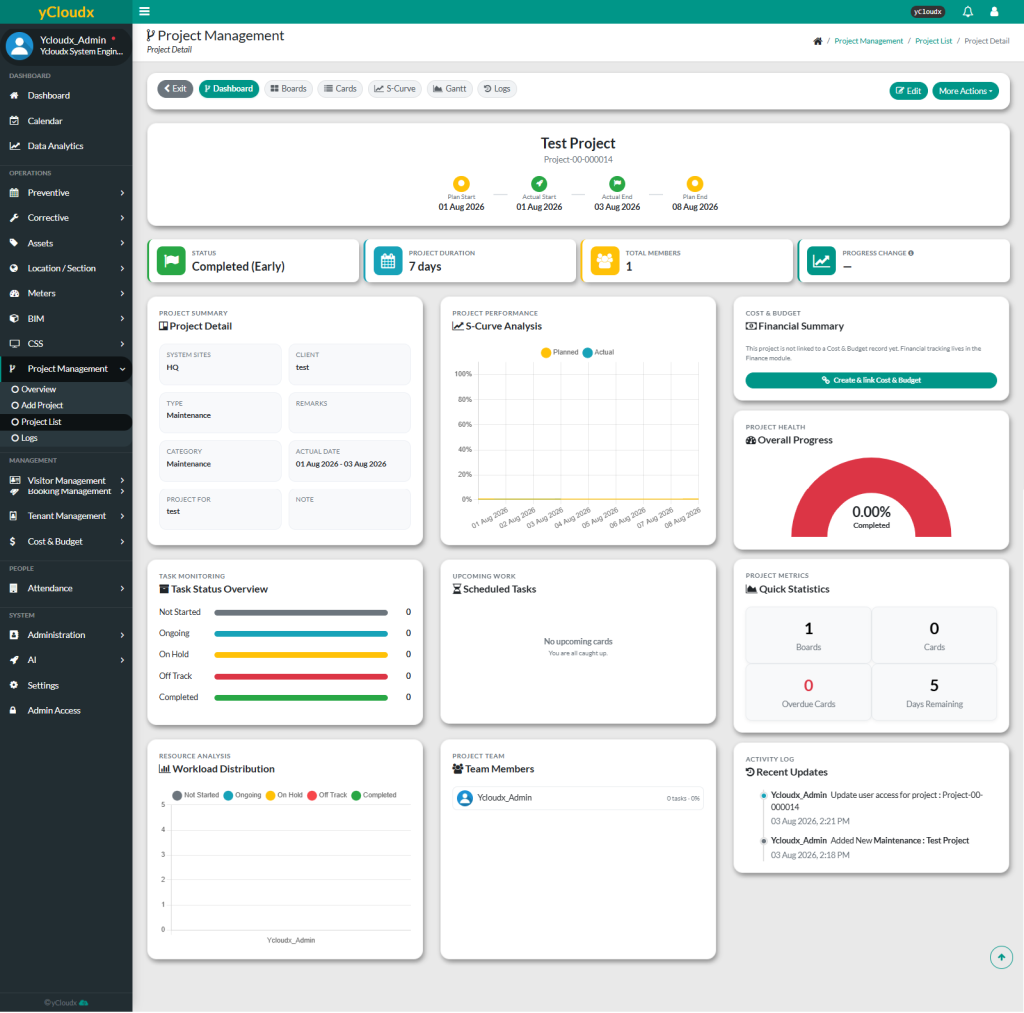
User will be redirected to the project details page
User can view the project in Project Management > Project List