There are three (3) methods to create preventive schedule
Preventive > New PM
Asset > Asset List > Select asset > Schedule
Preventive > Forecast / Schedule
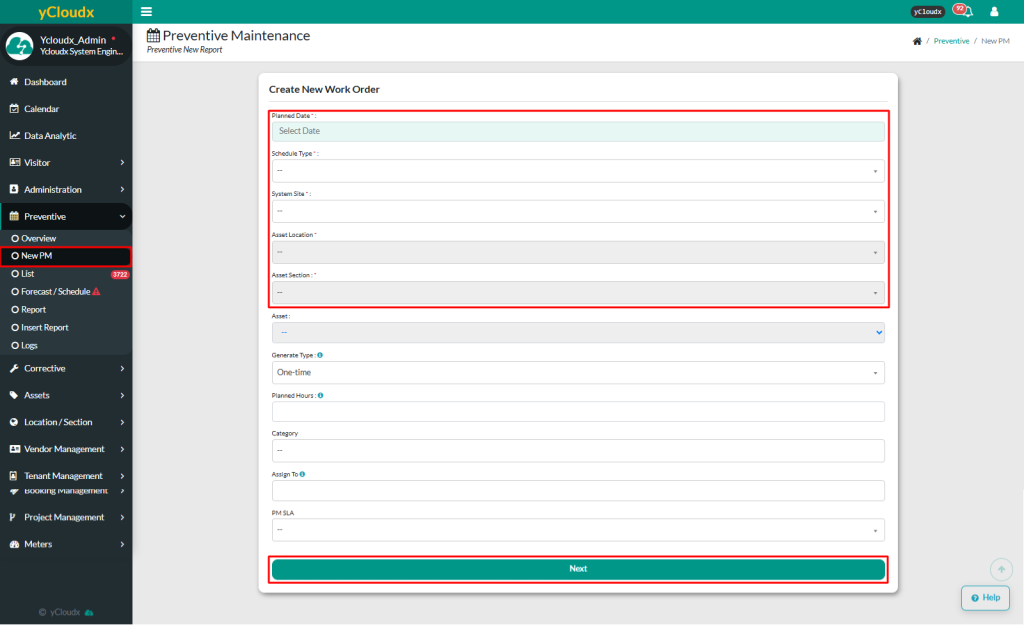
A: Preventive > New PM
Proceed to Preventive > New PM
Fill in the form to create new work
The required fields are Planned Date, Schedule Type, System Site, Asset Location and Asset Section. While other fields are optional, but it is recommended to fill in all details including Asset, Generate Type (One time or Generated), Planned Hours, Category, Assign To and PM SLA
One time – Generate the work order once
Generated – Automatically generates each day, week, month or year
For plan date, user can select a date or just simply tick the current time box to use the present date and time
Click Next to proceed to the checklist selection page
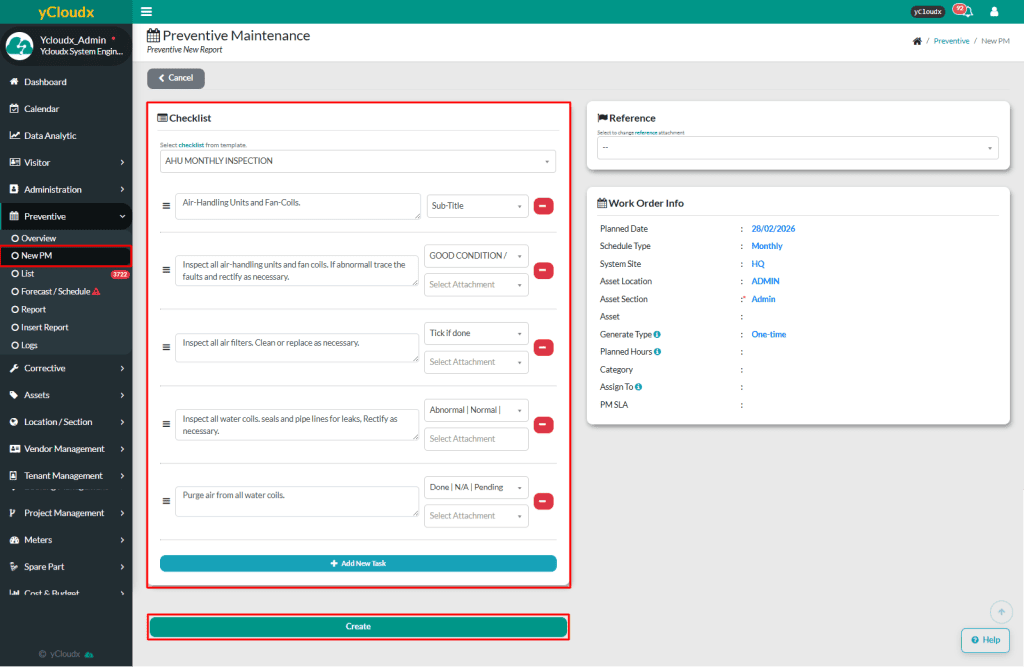
Select checklists from the provided template or manually insert tasks to be used
Click Create to create new work and the work order will automatically be added to the Preventive > List
A popup notification will appear to confirm that the new PM has been successfully created
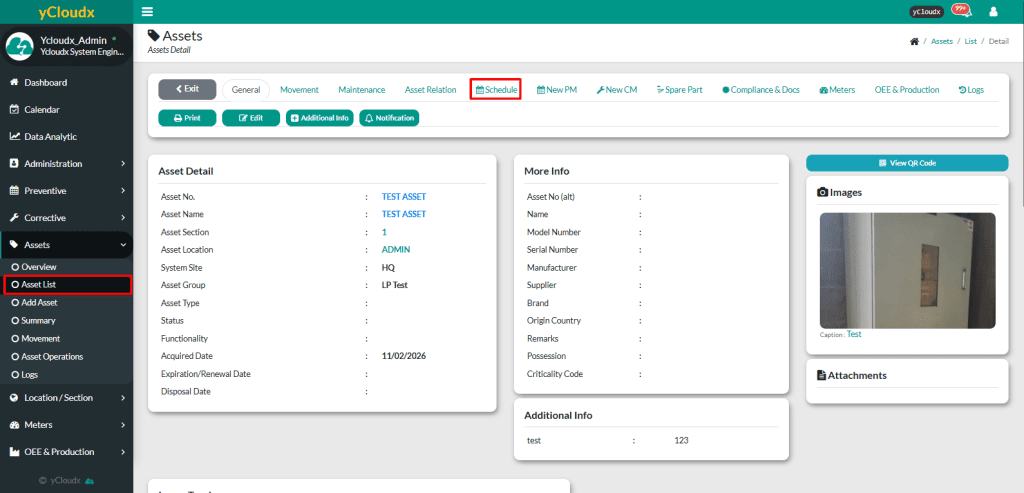
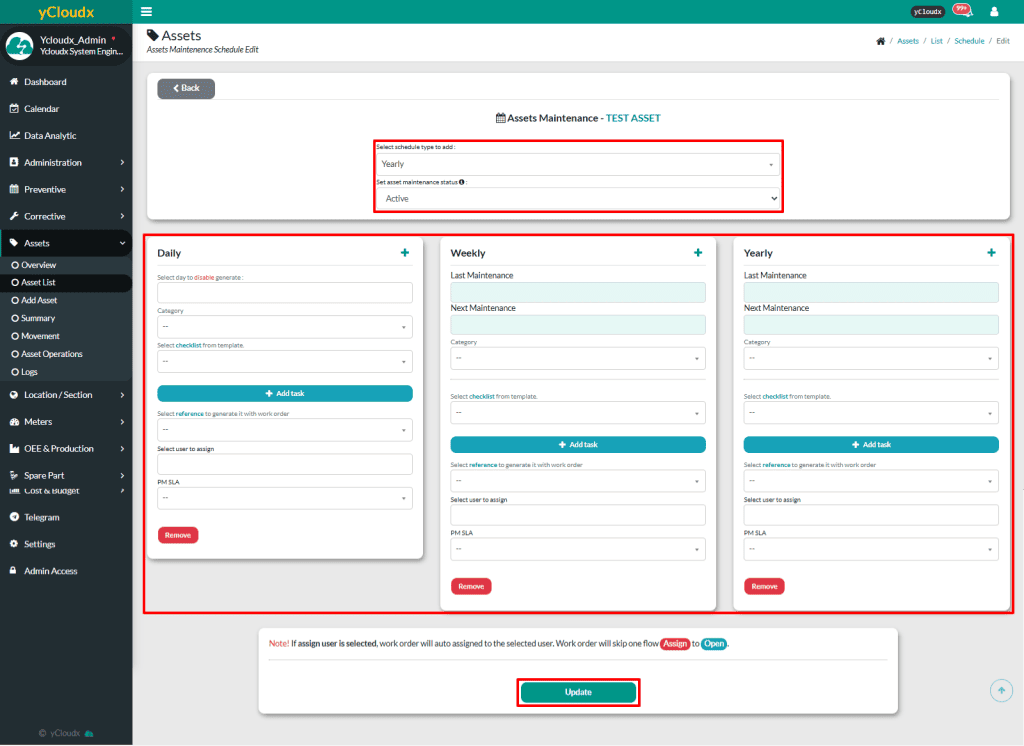
B: Asset > Asset List > Select Asset > Schedule
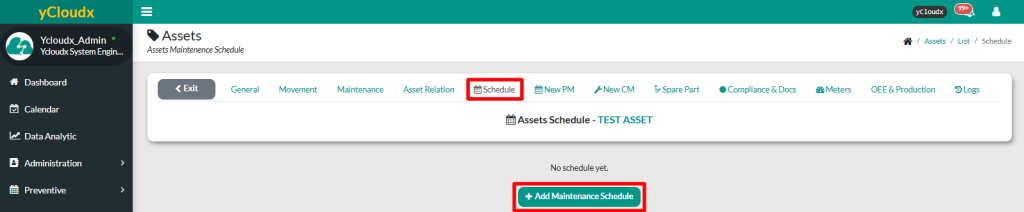
Proceed to Asset > Select asset > Schedule
Click Add Maintenance Schedule
Select Schedule Type to Add (Daily, Weekly, Monthly, etc.)
Fill in the details to generate the schedule, including select day to disable generate (for Daily), last and next maintenance, category, select checklist or add task manually, select user to assign and PM SLA. All fields are optional, but it is recommended to complete the details.
Click Update to create new schedule and the work order will automatically be added to the Preventive > List automatically based on the Next Maintenance Date and Type
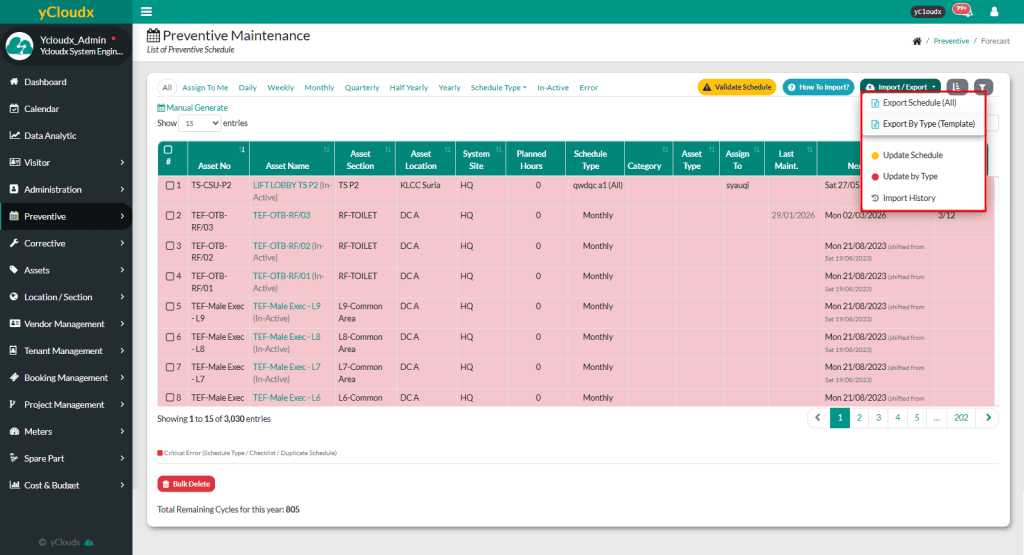
C: Preventive > Forecast Schedule
Proceed to Preventive > Forecast Schedule > Import / Export
Click Export Schedule (All)button
Once exported, the file will be downloaded in Excel format. User needs to insert the work order details following the format in the exported file. Do not delete or remove any columns. Leave it blank if there is no information for the column
The text fields marked with (*) are mandatory, such as Location, Type and Next Maintenance.Other fields are optional but it is recommended to fill in all details
Save the document and proceed to update the preventive schedule in the system